| Installing Bilstein Rear Shocks on Our 2006 Itasca Navion (Dodge/Mercedes Sprinter 3500 Chassis) |
|
by Ellsworth Chou
|
Modern road vehicles have springs so that when a moving vehicle's tire encounters a bump or dip in the road, the rest of the tires can maintain their contact with the road surface. Shock absorbers (or "dampers," as they are more appropriately called outside the U.S.) are intended to dissipate the energy stored in a vehicle's suspension springs when they are deflected by a road surface change. Without the shocks, a vehicle would continue to repeatedly bounce long after passing over a bump or dip in the road. If the bump were encountered during a turn, each time the vehicle bounced to the top of its spring cycle, it would un-weight those tires, reducing their ability to affect the direction of travel of the vehicle. Typical modern "tube" shocks convert the energy stored in the vehicle's spring to heat, squeezing a viscous fluid through passages in a piston, the resulting heat radiating out into the air through the body of the shock absorber.
I found the suspension of our 2006 Itasca Navion severely underdamped for its particular mass distribution. Mercedes' original expectations for their Sprinter 3500 chassis naturally predicts that users would add loads very low in the chassis - it's just easier not to lift heavy things very high. But when Winnebago built the View and Navion motorhomes on the Sprinter frame, they added several hundreds of pounds of material all the way up to the roof of the nearly 11-foot high vehicle. Owners of these vehicles well know that crossing a driveway ramp to or from a street at less than crawling speed can result in a violent series of side-to-side oscillations which will exploit any oversight in securing the contents of the RV (even forceful enough to pop open a poorly-aligned marine-style cabinet latch).
In the event of a rapid road maneuver, this poor damping could also lead to loss of vehicle control.
I'd read praise for Bilstein 4600 Series shock absorbers from members of various online Sprinter forums, crediting the Bilsteins for significant abatement of these poor chassis characteristics. So when a member of the "View-Navion Tech" Yahoo! group recently mentioned the rear Bilsteins for Sprinters on sale at a good price, I ordered a pair.
I'd installed a Roadmaster auxiliary rear sway bar on the Navion in our driveway, so I knew I could get access to the shocks while on the ground using only some solid wood ramps to add some comfortable working space (though it's possible to do the work with the vehicle on the ground if you're of normal, uh, thickness).
The Bilstein 4600 Series shocks for the 2005 Sprinter 3500 chassis on which our 2006 Itasca Navion is built are Bilstein model number 24-177702.
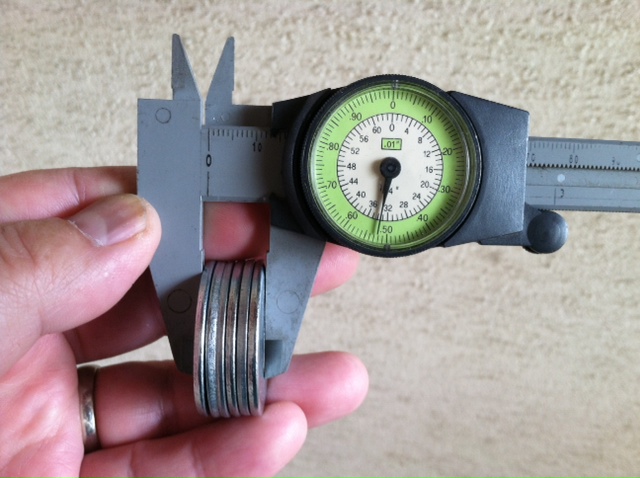 |
A dial caliper makes measuring tasks easy |
Years ago, when moving a car with a front air dam which prevented us from driving the car up the ramps of a rented trailer, we knocked together a pair of solid wood ramps out of 2" x 12" lumber. I've since built a second set, for a total of four ramps. They're simply a 12", 24" and 36" long piece of 2" x 12", nailed together so that the result is a 36" long, 3-step ramp. The resulting ramps are heavy, but they're also not going to collapse. The additional height makes for a relatively comfortable workspace. I use a sheet of masonite to facilitate sliding my body around under the vehicle, and use many handholds in the underside of the vehicle to pull myself around. Major hardware stores offer lumber-cutting services, so making ramps is an easy project.
As an added safety element, in the entirely unlikely event that any or all of the tires on the rear axle were to suddenly deflate, the ramps would provide the same under-chassis height as the vehicle normally has on the ground. I prefer this concept to dependence on jack stands.
(click and hold on any images on this page to enlarge them)
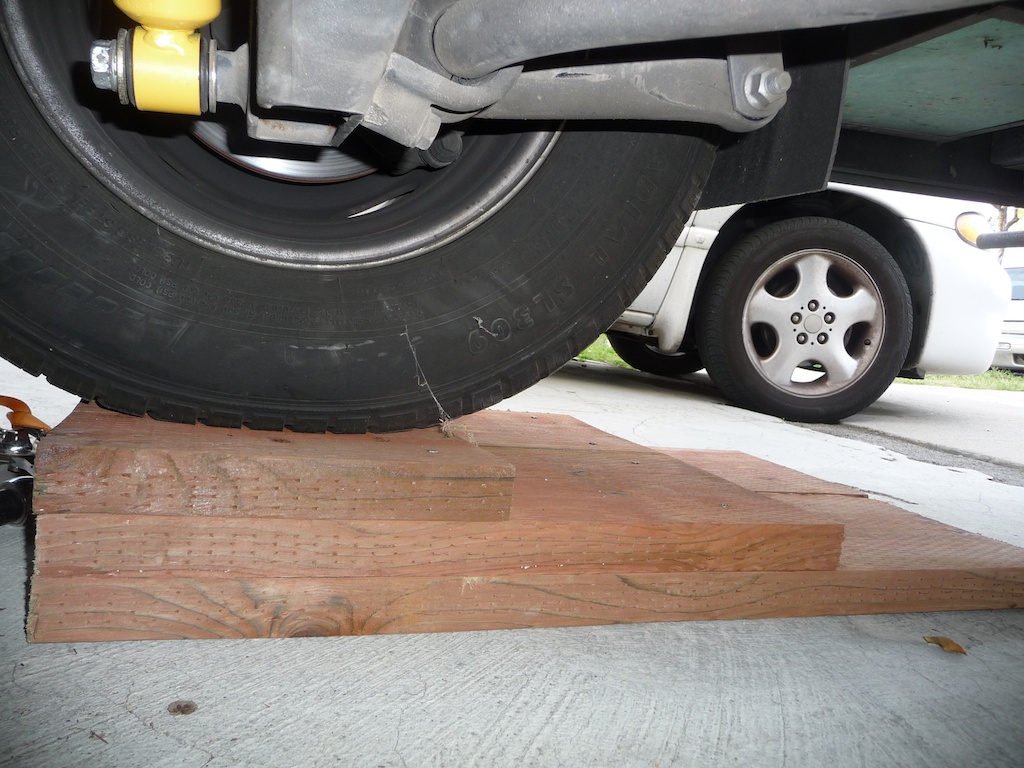 |
Two of the solid wood ramps at the right rear of the Navion |
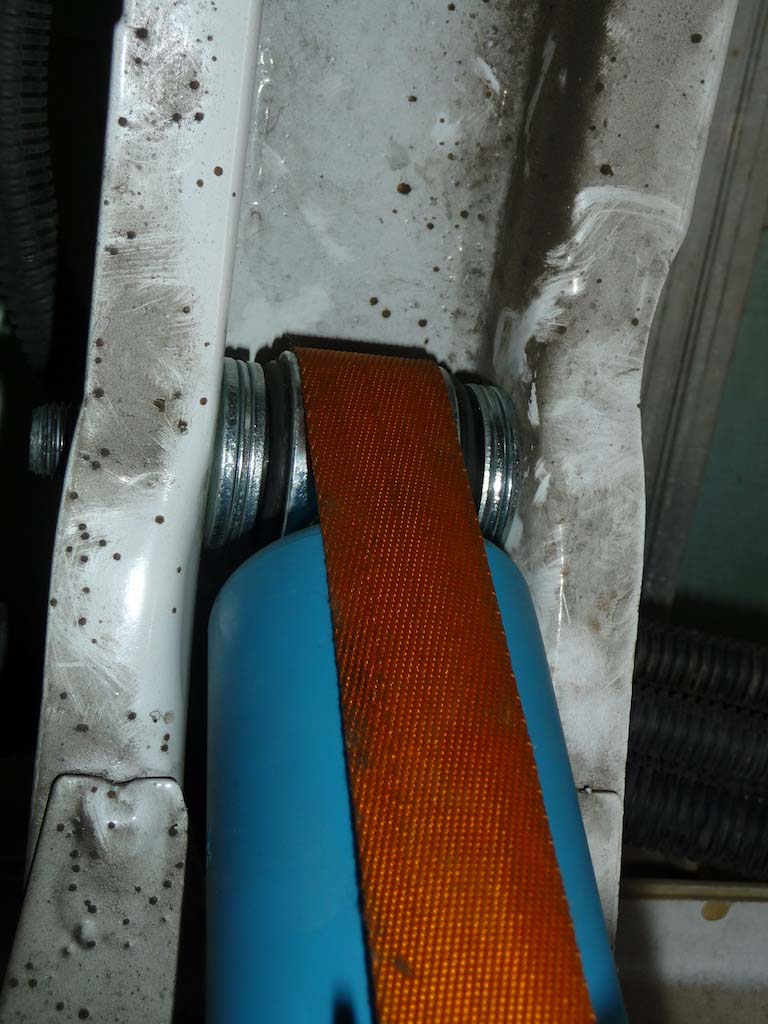
Unlike the Sachs rear shock absorbers originally installed on the Sprinter, the Bilsteins are "gas pressure" shocks. Under extreme conditions, oil inside the shock can experience cavitation. This can cause the oil to foam, at which point the shock fails to appropriately damp spring energy. Nitrogen gas inside shocks pressurizes the oil environment, significantly supressing cavitation and foam production.
A secondary characteristic of gas-pressure shocks is that when unloaded, the piston and piston rod fully extend from the nitrogen gas' pressure. Depending upon the shock model, this pressure be quite significant - some are capable of supporting more than a man's weight without any compression. This poses a complication regarding installation when compared to non-pressurized shocks, which can be compressed and extended by hand.
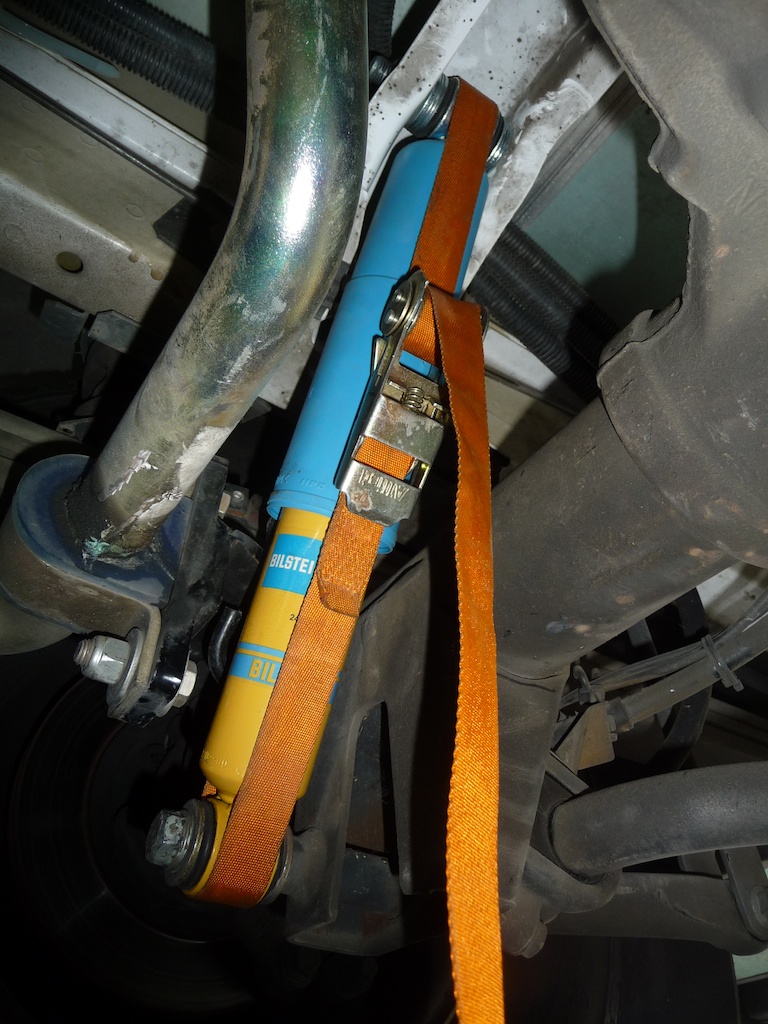
The solution I used was to compress the shock with a small "ratchet strap." This worked very well, but was a bit tricky to execute.
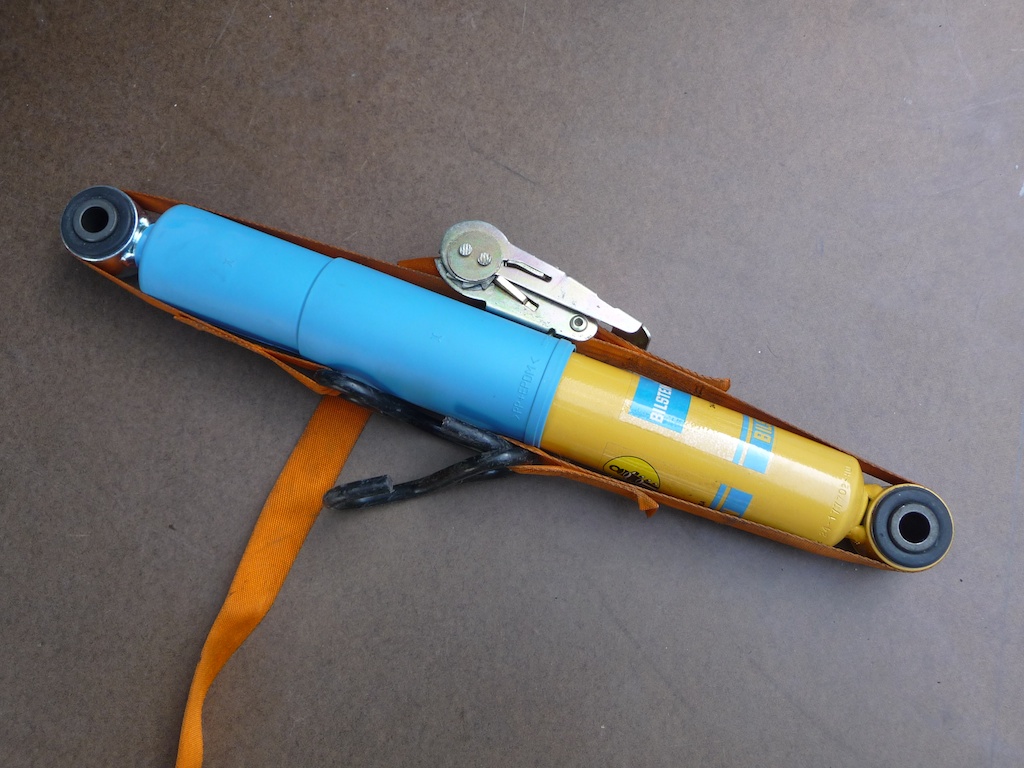 |
Shock pre-compressed with ratchet strap to installation length |
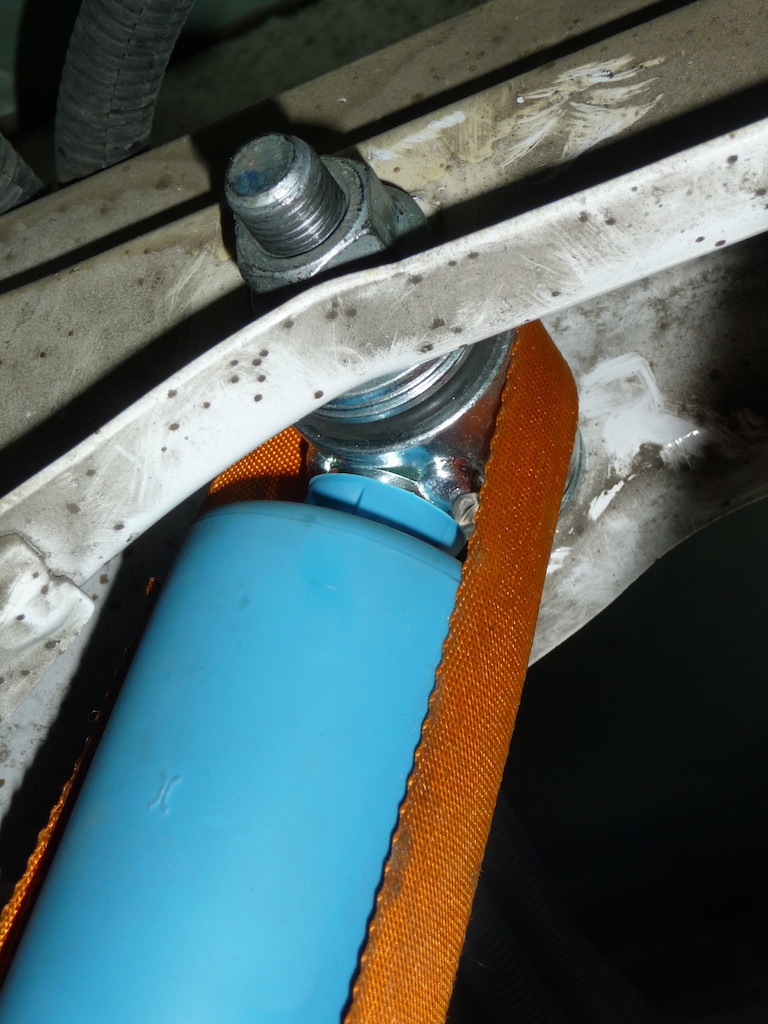
Because the top end of the shock (with the blue dust cover in these photos) is bolted into a confined space within a U-shaped channel of the frame, there is not adequate clearance above the top of the installed shock to pass the hooks or the ratchet of the strap. It is therefore necessary to un-thread the strap from ratchet to recover the strap assembly once the bolts are all tightened. Only one end of the strap has a free end (the other three having either a hook sewn in or the ratcheting assembly itself). You may wish to practice with the parts before attempting this under the vehicle. Here are the important points about working with the ratchet strap:
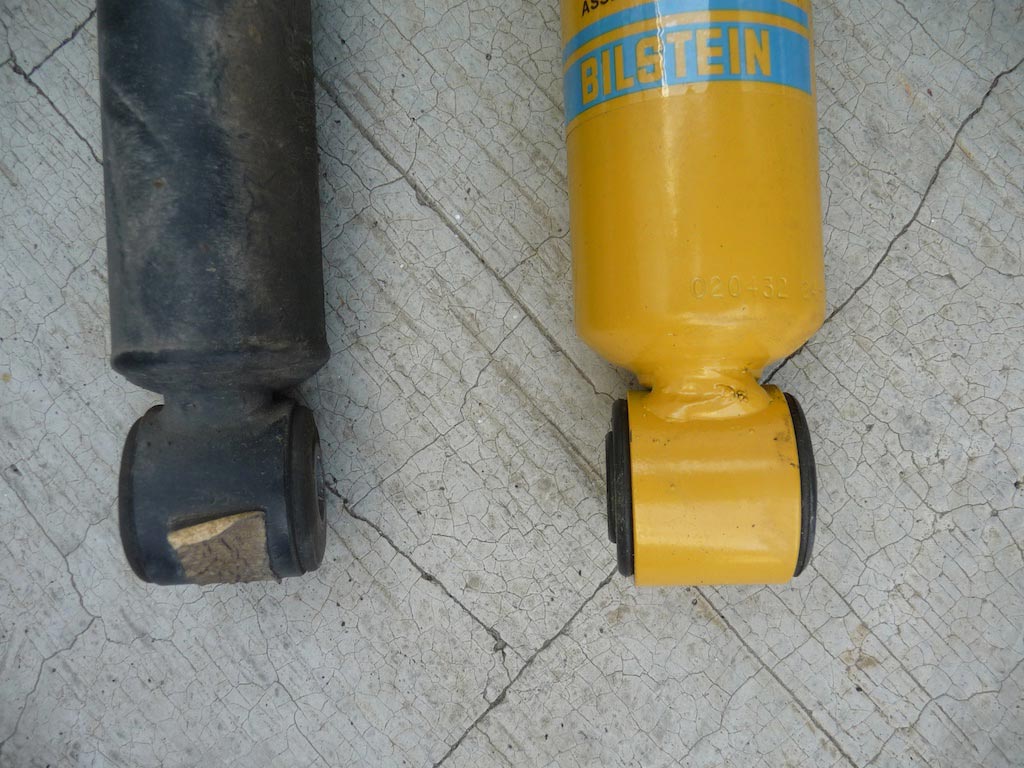
Though the bottom mounts and bushings of the original and replacement shocks are similar, there is a significant difference between the top bushings.
(click and hold on any images on this page to enlarge them)
 |
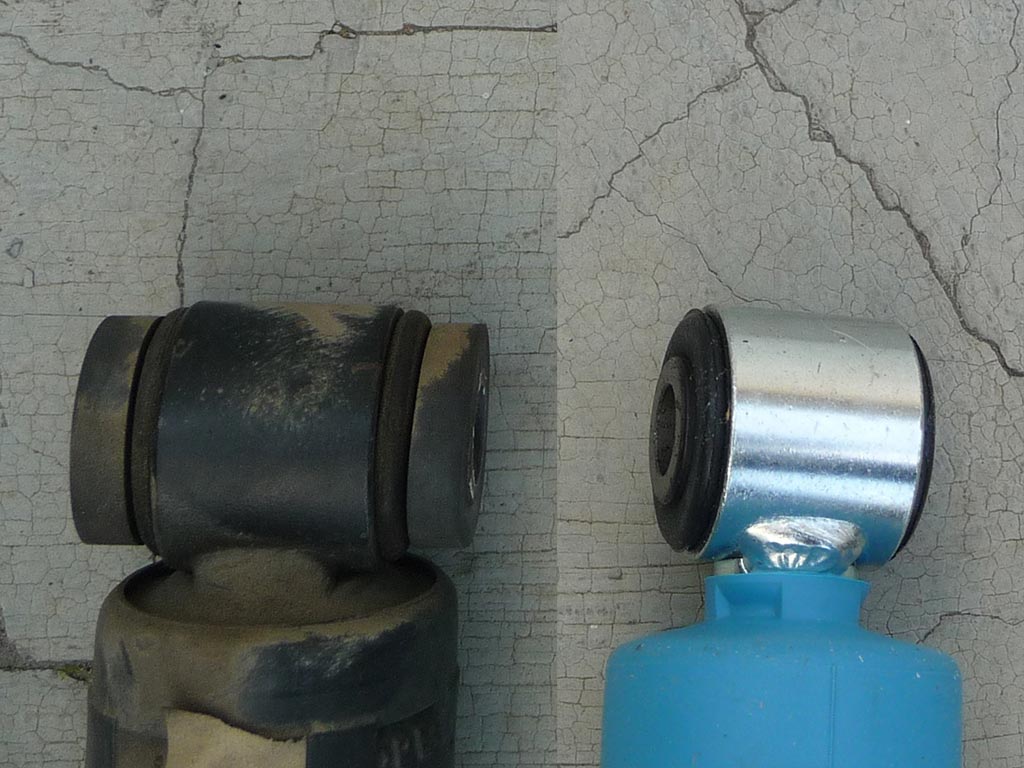 |
| Original Sachs bottom mount bushing (left) and the Bilstein (right) | Original Sachs top mount bushing (left) and the Bilstein (right) |
As you can see in the photo at right, the top bushing of the Bilstein shocks is quite different from that of the original Sachs part. The "bushing" is a solid steel tube that is mounted inside the shock mount inside a tubular rubber isolator. The tube is between 2-1/8" and 2-1/4" long, and when the top bolt is at specified torque, this tube is fully loaded along its length by the clamping force of the bolt. The Bilstein bushings were only a little over 1-1/2" long - over a half inch shorter. The rails of the U-shaped channel in the frame through which the top bolt passes can be bent by the clamping force, and if no compensation is made for the difference between the bushing lengths, the act of torquing the top bolt would distort the frame metal, crushing the channel until it came into contact with the Bilstein's shorter bushings before finally reaching the desired amount of clamping force.
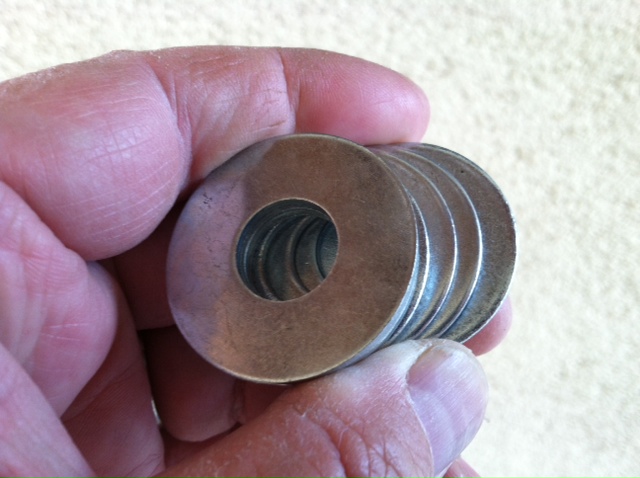
To compensate for the different bushing lengths, I simply added hardware-store washers as shims. The washers had bolt holes designed for 9/16" diameter fasteners. When I inspected the washers in the bin at the hardware store, I found a huge variation in washer thicknesses. Not knowing exactly what the dimension I'd need would be, I spent some time and collected three size classes of washers: the thinnest washers, the thickest washers and some median-sized. I already knew that the gap was something under 0.60", so I'd need two stacks of washers of something under 0.3" total thickness for each shock - probably 12 washers. I purchased 20 washers (at 16 cents each) after digging through several hundred in the bin and measuring them with a dial caliper.
 |
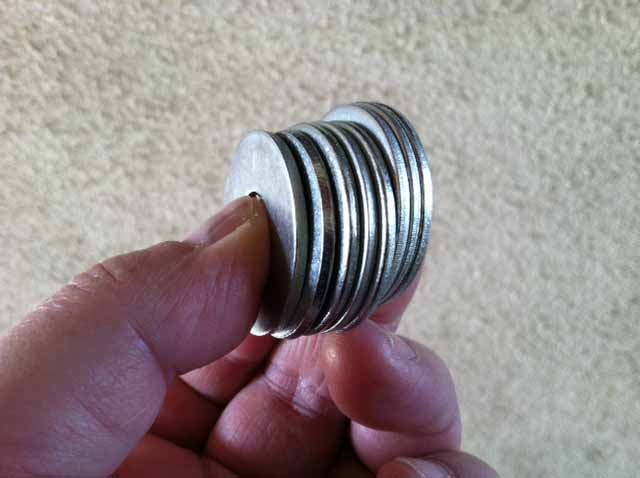 |
| Hardware store 9/16" I.D. washers cost 16¢ each | Three ranges of thicknesses were purchased. Most of those used were thickest and thinnest, in my case. |
Installing the washers wasn't as tricky as I'd initially expected. I'd insert the top bolt through the frame (the bolt head points toward the rear of the vehicle) until I could hang the rearmost three washers, then offer up the top end of the (ratchet-strap compressed) Bilstein, using my other hand to feed the bolt into the Bilstein's bushing. With the shock hanging and the bolt part-way through the bushing, I'd then feed the front three washers in a stack, all at once, into the remaining gap (which should theoretically be very close to the same as the thickness of this last washer stack). I'd support the washers with the tip of my index finger and thumb while wiggling the bolt to fish it through their centers. I did drop the washers on my head a couple of times, but it went pretty smoothly.
I'm reconstructing this a month after the fact, but here are the steps I remember:
| Fastener | N•m | Ft. Lbs. |
|---|---|---|
| Lower Shock Mounting to Rear Axle M12 x 1.5 Bolt (Sprinter 2500) | 70 | 52 |
| Lower Shock Mounting to Rear Axle M14 x 1.5 Bolt (Sprinter 3500) | 110 | 81 |
| Upper Shock Mounting to Frame (2500) | 80 | 59 |
| Upper Shock Mounting to Frame (3500) | 140 | 103 |
We've put a few thousand miles on the Bilsteins, and the improvement is noticeable. On the road, there's significantly improved damping over road profile changes which affect both sides of the axle equally. It's still possible to get the violent oscillations if we enter/depart a sloped driveway at too high a rate, but the threshold at which this happens has increased. I'm so encouraged by the results that I plan to install front Bilstein struts in the future, although I don't plan on attempting that installation myself, as this requires major disassembly of each front suspension corner, and we don't have provisions for doing this withs so large a vehicle.

 |
All contents Copyright 2013-2023 Ellsworth Chou |